
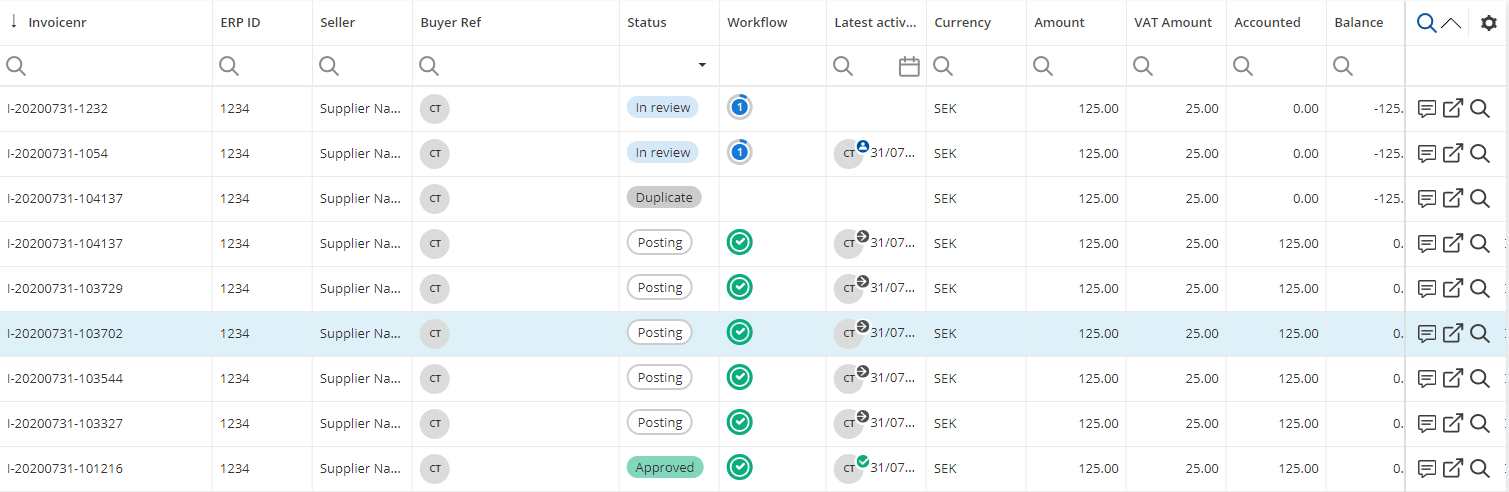
The invoice will have to be manually approved and posted to set in in state "Posting". Log in as a controller or approver user with access to the same organization and client.After a 1-2 minute delay, you should see the invoice listed as below.
Approving the Invoice
- First, assign the invoice to your own user in the invoice list. This will start the workflow and set the invoice in status "In Review".

- Click on the workflow symbol to open the workflow view. Then click the small tick mark next to your name to approve the invoice.
Coding the Invoice
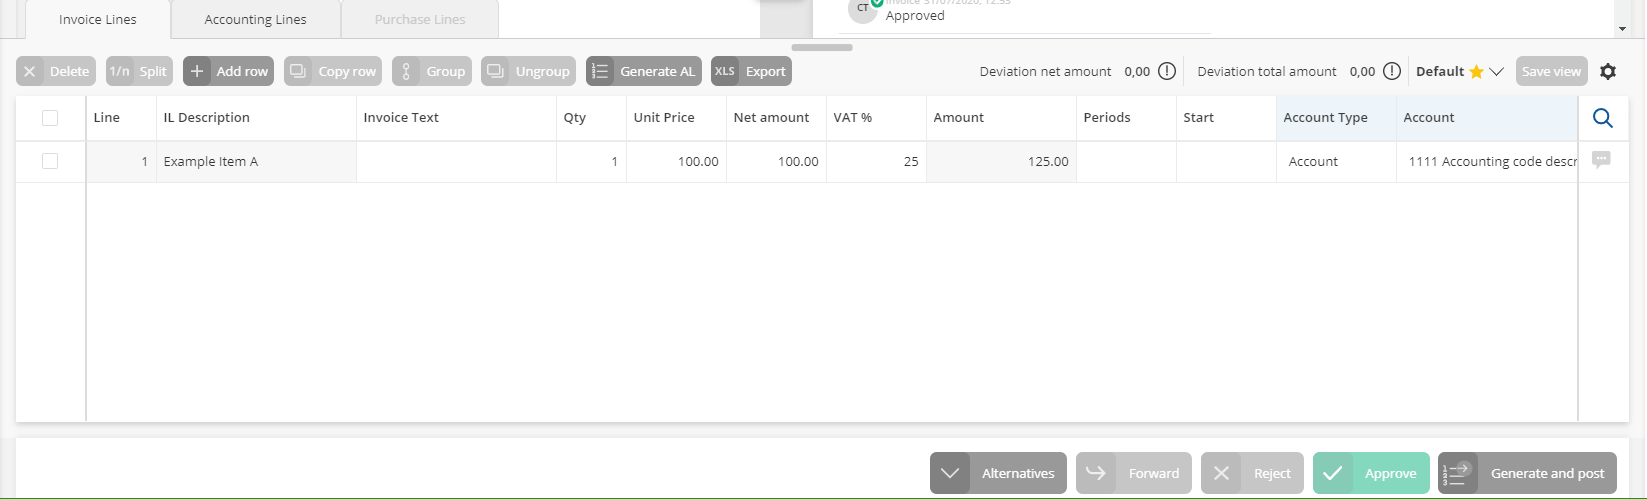
- Open the invoice and select the GL account previously imported through the integration API.
Posting the Invoice
- Click on "Generate AL" (Generate Accounting Lines) to prepare accounting lines for posting to your ERP system.
- Click on "Post" on the bottom toolbar. The current invoice will close and the next will open, ready for processing.
Comments
0 comments
Article is closed for comments.